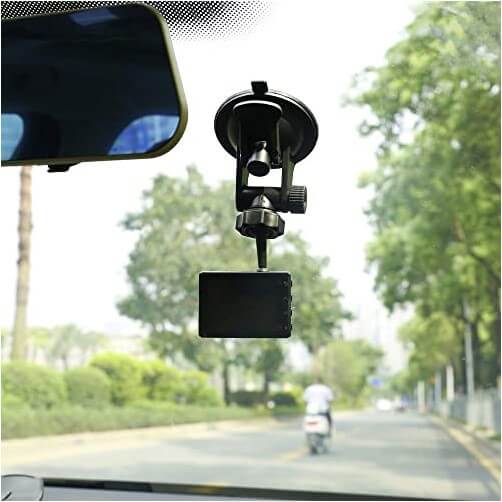
Dash Cam Mount Installation
The primary goal of a dash cam is to provide unshakeable evidence during a road incident. Achieving this requires more than just high-end sensors; it demands a professional installation and a proactive maintenance cycle. A camera that is poorly mounted or powered by an unstable source will fail to record the critical moments that matter for insurance claims and legal defense.
This guide provides a comprehensive framework for dash cam ownership, covering the physical installation process, power management solutions, and the technical maintenance required to ensure 24/7 reliability. By following these engineering standards, you ensure your dash camera functions as a dependable security instrument for years of operation.
Installation & Maintenance: Quick Reference Guide
| Goal | Optimization Standard | Key Hardware |
|---|---|---|
| Placement | Center/Right of Rearview Mirror | 3M VHB Adhesive Mount |
| Power | Hardwired to Fuse Box (Constant) | High-Quality Hardwire Kit |
| Memory | Formatting every 30-60 Days | High-Endurance MicroSD |
| Parking | Low-Voltage Cutoff Enabled | Multi-Channel 4K Setup |
Why Proper Installation is Essential for Evidence & Safety
A professionally installed dash cam maximizes the field of view while minimizing driver distraction. Improper placement often leads to “wiper shadows” or “dashboard reflections” that obscure license plate details. Furthermore, a secure mounting solution eliminates vibration, allowing the camera’s image stabilization algorithms to function efficiently.
Safety is the second priority of a correct setup. Cables must be routed behind trim panels to avoid interfering with airbag deployment zones. A dash cam that obstructs the driver’s forward visibility is both a safety hazard and a legal liability in many jurisdictions.
Powering Your Dash Cam: 12V Adapter vs. Hardwiring
The power source determines the camera’s recording capability and its ability to monitor your vehicle while parked. Most dash cameras include a standard 12V cigarette lighter adapter for immediate use. For a permanent and more robust solution, a hardwiring kit is the industry standard.
12V Cigarette Lighter Adapters
The 12V adapter is the simplest power solution. It provides reliable power while the engine is running but typically disconnects when the ignition is turned off. This prevents the battery from draining but also disables “Parking Mode” features. Drivers using 12V adapters should inspect the plug monthly to ensure road vibrations have not loosened the connection.
Hardwiring Kits (Fuse Box Method)
Hardwiring connects the dash cam directly to the vehicle’s fuse box. This method provides two distinct advantages: a hidden, professional-looking install and a constant power source for parked incident recording. Most hardwire kits include a low-voltage cutoff to protect the vehicle’s battery from deep discharge.
Decision Matrix: 12V Adapter vs. Hardwiring
- Choose 12V Adapter If: You drive a rental car, want a zero-tool setup, or do not require recording while the engine is off.
- Choose Hardwire Kit If: You want a “factory-clean” look, require 24/7 Parking Mode, and want to free up your cigarette lighter port.
Step-by-Step Hardwiring Guide
Technical Stats:
- Difficulty: Moderate
- Estimated Time: 45–60 Minutes
- Tools Required: Circuit Tester (Multimeter), Plastic Trim Tool, Pliers, Fuse Taps.
- Identify the Fuse Box: Locate the interior fuse Box (usually under the dashboard or behind a kick panel).
- Find an “ACC” Fuse: Use a circuit tester to find a fuse that only has power when the ignition is on.
- Find a “Constant” Fuse: If your camera has parking mode, find a fuse that always has power (e.g., hazard lights).
- Connect the Ground Wire: Attach the black ground wire to a bare metal bolt on the vehicle’s chassis.
- Install Fuse Taps: Insert the hardwire kit leads into the identified fuse slots using “Add-a-Circuit” taps.
- Test the Connection: Power on the camera and verify it switches to parking mode when the engine is turned off.
Mounting Options: Suction Cup vs. Adhesive
The mount is the interface between the vehicle and the camera. Choosing the wrong mount type can lead to camera “sag” or total detachment during extreme temperature fluctuations.
| Mount Type | Best Use Case | Stability Level | Stability Attribute |
|---|---|---|---|
| Adhesive (3M VHB) | Permanent installations | Maximum | Vibration-proof; high heat resistance. |
| Suction Cup | Rental cars or temporary use | Moderate | Portable; prone to failure in extreme cold. |
| Mirror Mount | Discreet, “hidden” setups | High | Stable; uses existing rearview mirror stem. |
Adhesive Mounts (Recommended)
Adhesive mounts use 3M VHB tape to bond the camera directly to the windshield glass. They are significantly more stable than suction cups and occupy less space, making them the preferred choice for 4K and multi-channel systems. Once installed, an adhesive mount is nearly impossible to shake loose, ensuring an unbroken “Subject-Predicate-Object” recording path.
Hiding Your Wires: Cable Management & Placement Tips
Effective cable management prevents “cable clutter” and ensures the installation looks factory-integrated. Use a plastic trim tool to tuck the power cable into the headliner and along the A-pillar weatherstripping.
Placement Pro-Tip: Mount the dash cam directly behind or to the right of the rearview mirror. This position centers the lens for an optimal viewing angle while keeping the device out of the driver’s primary line of sight.
Maintaining Your Dash Cam: SD Card Health & Formatting
The MicroSD card is the most frequently failing component in any dash cam system. Unlike standard digital cameras, a dash cam writes data continuously at high temperatures, which wears out flash memory cells rapidly.
Why You Must Use “High-Endurance” Cards
Standard SD cards are designed for burst writing and will fail within weeks of dash cam use. High-Endurance cards are engineered for 100,000+ hours of continuous recording. Using a standard card often voids the warranty of high-end cameras like Vantrue or BlackVue.
| Brand | Model | Endurance Rating | Recommended Use |
|---|---|---|---|
| SanDisk | Max Endurance | 120,000 Hours | Heavy 4K Multi-channel use |
| Samsung | PRO Endurance | 140,000 Hours | Budget-friendly reliability |
| Kingston | High-Endurance | 80,000 Hours | Standard 1080p/2K setups |
Monthly Formatting Procedure
You must format the SD card inside the camera menu every 30 days. Formatting clears dead memory blocks and refreshes the file allocation table. This simple step prevents the “Memory Card Error” messages that often lead to recording gaps.
Troubleshooting Common Issues: GPS Lag & Recording Breaks
Even a perfect installation requires occasional troubleshooting. Most issues are caused by power instability or storage degradation.
Fixing GPS Lag
GPS modules can take 1–3 minutes to acquire a satellite lock (cold start). If your camera consistently fails to show speed or location data, ensure the GPS antenna is not mounted behind metallic window tint, which blocks satellite signals.
Eliminating Recording Breaks
If your footage features “missing segments” or skips frames, your SD card’s write speed has fallen below the camera’s requirement. Replace the card with a V30-rated High-Endurance model immediately to restore the integrity of your evidence.
Frequently Asked Questions about Dash Cam Mounts
Can I install a dash cam myself or should I hire a professional?
Most users can install a dash cam successfully using basic tools and a hardwire kit. Professional installation is recommended for luxury vehicles with complex electrical systems or if you are uncomfortable working with the vehicle’s fuse box.
How do I check if my hardwire kit is compatible with my car?
Hardwire kit compatibility depends on the fuse type used in your vehicle. Common fuse types include Mini, Low-Profile Mini, Micro2, and ATO. Check your owner’s manual or pull a fuse to verify the size before purchasing your kit.
What is the best SD card for a 4K dash cam?
The SanDisk Max Endurance and Samsung PRO Endurance are the top-rated cards for 4K dash cams. These cards provide the V30 write speed required for high-bitrate video and the thermal resistance needed for dashboard environments.
Why does my dash cam fall off in the summer?
Suction cup mounts often lose suction when the windshield heat causes the air inside the cup to expand. Replacing a suction mount with a high-heat resistant adhesive mount solves this problem permanently.